
 For Day One, my calendar calculation routine, I recently released a custom-designed calendar clipboard which helps make the feat visible to a small crowd.
In today's post, I'll show you how to put together your own calendar prop inexpensively, and even some other directions you can take the basic idea.
To start, you'll need a magnetic dry-erase board with a blank calendar pre-printed on it. I used an 11 by 14 dry erase calendar from Expo, which comes with two magnets. The two important features in the board are that it be magnetic, as well as small enough to use and carry for a performance, while still being visible for your audience. You'll also need to make sure your chosen board has 5 weeks to mark.
You'll also need a dry erase marker (usually included with dry erase calendars), a dry erase eraser, and a permanent marker, such as a Sharpie. Optionally, you may want a ruler for making your marks consistent. If you choose a ruler, I suggest a cork-backed ruler to minimize damage to the board.
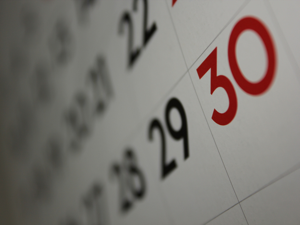
What you're going to do is use the permanent marker to write the dates in the squares from 1 through 28, similar to the way the calendar clipboard is laid out. Most dry erase calendars have a small space in a corner for the date, such as the corner notches seen on this dry erase calendar, but for better audience visibility, you'll want to use as much of each date's square to write the date.
If you prefer, you can use the ruler and a dry erase marker to create even guidelines for your dates first. Personally, I didn't do this. In performance, I need to write and/or erase 29, 30, and 31 on the board, and those will usually be written freehand, so they tend to stand out if the other dates aren't written freehand, as well.
What happens if you make a mistake when writing with a permanent marker on your dry erase calendar? Don't worry, there are numerous ways to remove permanent marker off of your dry erase board. The simplest and most surprising of them uses only a dry erase marker and eraser to remove permanent marker.
Once you've written the dates from 1, in the upper-leftmost square, through 28, in the rightmost square of the 4th week, using large numbers as discussed above, you can put the permanent marker away.
Not surprisingly, most dry erase calendars have the days of the week permanently marked at the top. Yet, you need to be able to change the days of the week in routines like Day One. To solve this problem, I simply use magnets printed with days of the week. This is why I emphasized the importance of a magnetic dry erase calendar earlier. Even on larger boards, these days of the week magnets cover the pre-printed days, and highlight the days printed on the magnets.
Before each performance, you'll use a dry erase marker to write 29, 30, and 31 on the first 3 squares of the 5th week on the calendar, and have the days of the week magnets arranged in the remaining 4 days of the 5th week in the calendar.
When you're given the month and year, write them in the space for the month at the top, and use the Day One technique to determine where to place each day of the week magnet. After placing the magnets, erase any of the last 3 dates as needed (For example: If you're given a February in a leap year, erase the 30 and 31, leaving the 29) and your calendar should be arranged correctly!
After each performance, erase all the dry erase markings, and put the magnets back down in the 4 empty squares of the final week. If you're about to do another performance, write the 29, 30, and 31 back in. If you're not, you can simply put the board and magnets away until you're ready to perform again.
The basic idea of using permanent markers to create a custom design (and knowing how to remove it in case of mistakes), should start the gears turning for other ideas. Starting from a blank dry erase board, you could create things like a grid for a magic square or a chessboard for the Knight's Tour.
The cork-backed ruler I mentioned earlier is an essential when designing grid-based layouts, of course. For the chessboard, I recommend creating the board in a blue that's dark enough to be distinguished easily from the white squares, yet still light enough to contrast with dry erase numbers written in black.
Don't forget that using a magnetic dry erase board can also be a great way to display magnetic playing cards, either in full-size or in miniature.
For one last idea to inspire you, how about a Sudoku grid? You could use it to display your apparent Sudoku genius as taught in Werner Miller's Swindle Sudoku routine!
That should be enough to be enough to inspire you and get you thinking about different ways to customize and present the mental feats you've learned here on Grey Matters.
For my next puzzle, I'll try figure out why custom-printed dry erase Sudoku boards are so much more readily available than custom-printed dry erase chess boards.
0
Calendar Craft
Published on Thursday, October 25, 2012 in calendar, fun, Knight's Tour, magic squares, playing cards, products, Sudoku
Spread The Love, Share Our Article
Subscribe to:
Post Comments (Atom)


No Response to "Calendar Craft"
Post a Comment